Tuesday

Journal Entry for Tuesday, February 26th

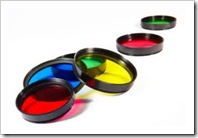
Lens FiltersToday’s Photo Tip: My renewed interest in producing Black & White images led me to scour the Internet for info pertaining to making the best captures for later conversion. This led to the study of photography filters. Though I already own three filters, a UV, Circular Polarizing Filter and a Neutral Density filter, I learned of many more and how they could help to improve my images. After combining and reducing my notes on this subject, I created the following photo tip … A Primer on Understanding Photographic Filters.

Monday

Journal Entry for Monday, February 25th
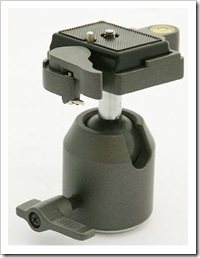
Monopod HeadToday’s Photo Tip: This tip, titled “Avoiding Camera Shake”,  points out some steps for taking handheld photos as well as for using a monopod and a tripod. Sometime these things sound really simple, however, failure to incorporate them into a regular routine can be cause for less than satisfactory picture results.  After combining information found on three different sites, I created the following photo tip … Avoiding Camera Shake.


Saturday

Journal Entry for Saturday, February 23rd
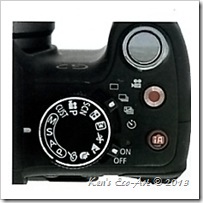
Mode dial003Today’s Photo Tip: The last couple of days I spent some time reading the manual on my camera (The Paanasonic Lumix DMC-G2 – The Unofficial Quintessential Guide) in and effort to better familiarize myself with the camera's various shooting modes. This led to a little Internet research on camera mode dials and modes. I combined my notes on these two efforts into the following photo tip … Understanding Camera Modes.

Tuesday

Journal Entry for Tuesday, February 19th
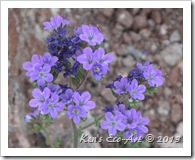
E-P1040105Today's Photo Tips: With spring fast approaching, I began looking into tips on taking pictures of wildflowers. After reading several articles on the subject, I compiled a list of notes that I was finally able to put together as a list of tips that I used to create the following photo post … Taking Pictures of Wildflowers.    

Sunday

My Latest Musing

chimp-thinkingIn keeping with my new year’s resolution to take more Black & White pictures, I’ve been review some of last years picture to see if they lend themselves to this conversion process. Click on the link below to check out my latest musing on a Black & White conversion of a picture that I recently added to my Photo Gallery Blog. Musings - Black & White Conversions


Friday

Avoiding Camera Shake

Photo TipsToday’s Photo Tips: Camera shake is probably one of the most common causes of un-sharp images. Assuming you have a good lens, have it accurately focused, and have chosen the correct aperture and shutter speed, camera shake remains your next biggest problem. Here are some simple tips that will help you to reduce camera shake.


Taking Handheld Pictures:  You can vastly improve your chances of taking sharp pictures by developing proper procedures and stable hand-holding techniques with your camera.
  • Make sure the shutter speed is faster than the effective focal length of the lens, e.g. 1/80 sec for an 80mm focal length.
  • Make sure the lens or camera's  image stabilization is turned on.
  • When standing, first, wrap the camera strap around your elbow and pull it taught. Cradle the lens underneath with one hand while gripping the camera body with your finger on the shutter with the other.
  • Finding something to lean on or against, such as a tree, fence post, large boulder or some other type of stationary object will always help to reduce camera shake.
  • Spread your feet shoulder distance, with one foot slightly behind the other. Sometimes kneeling down and placing your left elbow on your knee will provide greater stability.
  • Always take a deep breath and hold your breathing during the shot.
However, no matter how stable you can handhold your camera, there’s no getting away from it: assuming that the support is sturdy enough to hold the combined weight of your lens and camera, and you follow good technique, using a tripod or monopod will give you the best chance to avoid camera shake and get sharper pictures.


Using a Monopod
:
  In a word, the biggest advantage of a monopod is portability. Because most monopods are light and can be reduced down to about 24 inches, you can easily move it with you with camera and lens attached.
  • Activate your lens or camera's image stabilization feature.
  • Insure that you have a proper stance and placement of the monopod
    • STANCE #1: The most common use is to place the foot of the monopod straight out in front of you. Standing with your own legs square and spread to approximate shoulder width, put the foot of the monopod roughly centered between your legs, straight out in front of them so that the foot of the monopod ends up forming a triangle - similar to that of a tripod. 
      • Place the monopod in front of you so that when you tilt it back to bring the camera to your eye, it forms a 45 degree angle. NOTE: You will have to increase its length by quite a bit to get the 45 degree tilt and still have it at eye level. 
      • Your camera should be attached to a swivel head. Tilt it forward so that when the camera is at your eye, the lens is level even though the monopod is leaning at 45 degrees. 
      • When you are shooting, get into a good solid stance, and hold the camera firmly against your face. You now have a virtual tripod that is every bit as good as most actual tripods–with the added benefit of being easy to work with.
    • STANCE #2: The second most common use is to brace the foot of the monopod against the instep of your rear foot. In this method, stand with your hips at a slight angle to your shoulder, with one foot slightly behind with the foot of the monopod braced up against the instep of the rear foot and the pole angled to your other leg for additional bracing.
    • STANCE #3: The final stance is to place the foot of the monopod between your legs, with the foot of the monopod closer to, but behind the leading foot. In this stance the leg of the monopod braces against the leading leg of the photographer to give more stability.

      NOTE: As noted in stance #1 above, these stances will cause the monopod leg to be tipped at an angle, necessitating the need for an adjustable monopod head to maintain a level plane for the camera.
  • For smooth results, make sure you are free to rotate your body to cover the area that your subject is likely to be moving through.
  • When taking the shot, press down on the monopod slightly by placing your hand on top of the lens rather than holding onto the monopod itself.
The important thing to remember here is that using another part of your body to brace the monopod against it will increase stability. Try each method and determine which is best suited for your shooting needs and style.


Using a Tripod
:
  Because tripods are bigger and heavier, they are obviously more stable. The tripod (with remote shutter release) is essential for those crystal-clear nature shots where all camera motion must be eliminated. In addition, a tripod offers stand-alone features like setting it up and using a remote to snap pictures from a distance as well as the ability to take time exposures.
  • Turn your camera or lens' stabilization features off for shutter speeds greater than 1/4-sec.
  • When setting up the tripod, always make sure that you extend the thickest leg sections first.
  • When shooting on grass or soft ground, push the feet down into the surface to give it extra stability.
  • When on rock or hard ground, try to keep the legs more vertical and make sure the feet won’t slip or slide. Sometimes adding some weight to the tripods central column can add stability, especially on windy days.

A Primer on Understanding Photographic Filters

Photo TipsToday’s Photo Tips:  Filters are probably one of the least expensive accessories you can add to your camera bag that will make big changes in the way your pictures look. Obviously, the advent of digital photography has changed the use of filters and today’s powerful photo-editing software has eliminated the need for using many of them. Many people that think that if a filter is needed, they’ll just apply one in their photo editing software after the capture, however, there’s a couple reasons why this isn’t the best method. Achieving color filter effects in the digital darkroom can only produce a result similar to the one you would get if you actually used a color filter at the time of exposure. It need really good luck pulling detail and color back from an overblown sky because you were exposing for the foreground. All being said, you should always do everything possible to get the image to look its best in-camera.

Understanding the Various Types of Available Filters: There are many types of filters; UV, Skylight, ND, Polarizers, some often called, “protective” filters, as well as numerous filters for creating black and white images, special effects, color correction, color conversion and light balancing. Far too many to discuss here.

Anyone who has ever purchased a lens has had the salesmen offer to sell them a protective filter. Because most digital sensors incorporate UV and IR filters in their designs, UV lens filters are largely unnecessary, regulating the use of a UV filter or a clear filter to form a barrier protecting the lens against grit, grime, and fingerprints. Unfortunately, any filter adds one more obstacle to the clear path of light from the object to the cameras sensor. As such, it degrades the image, even if only slightly and also increases the likelihood of flare and ghosting. The best advice is only use a filter if there is a specific need to use it. Lets take a look at each of these filter types, and their specific uses.

UNIVERSAL USE FILTERS
UV Filters: A UV filter is used to reduce UV rays from entering the lens and striking the camera sensor and will reduce distant haze or fogginess . Because most digital sensors incorporate UV and IR filters in their designs, UV lens filters are largely unnecessary, regulating the use of a UV filter or a clear filter to form a barrier protecting the lens against grit, grime, and fingerprints.
Skylight Filters: A skylight filter (also known as a 1A filter) has a very pale magenta tint which is designed to slightly cut down on blue light and UV light. The effect is mainly for situations where light is slightly bluish such as that light found in hazy or cloudy weather. A good rule of thumb would be that the skylight filter works well for overcast or hazy conditions, but would fall short in open shade or at higher altitudes. While digital cameras can surely get the same benefits from these filters, it is a simple matter to correct color casts using post editing software.
Neutral Density (ND) Filters: Neutral Density (ND) filters are filters that are designed to reduce the amount of light entering through the lens. They come in handy when you’re in a bright light situation and you want to shoot at wider apertures to minimize depth of field or slower shutter speeds to show the motion of water. The come in various densities to reduce light by 1, 2, 3, or more stops. It is possible to stack 2 filters together to increase the density as needed.
Graduated ND (GND) Filters: Similar to the ND filter, GND’s have a gradual change from clear to gray, again in varying degrees of density. They are used when there are significant tonal differences between the foreground and the background. Taking a picture of a beautiful scene can be often spoiled when the camera’s meter properly exposes the sky but leaves the foreground in deep shadow. By using a GND, one can decrease the light from the brighter skies by several stops and properly expose the foreground. GND’s come in hard or soft versions. This refers to the abruptness of the change from gray to clear. Hard GND’s are good when there is a clear delineation at the horizon, such as oceans or flatlands. When trees and mountains are in the scene, a soft GND will help blend at the horizon level. GND’s are generally square and fit in a special holder, such as Cokin, and can be slid up and down inside the slot to align the horizon line to the transition line. .
Polarizer Filters: No camera bag should be without a Polarizer Filter. A polarizer is different than most filters in that it is composed of two pieces of glass, mounted independently inside a round frame so that one can be rotated relative to the other. As it is rotated, it increasingly cuts out glare and haze; you can actually observe this change through the viewfinder. Polarizers reduce glare from water, glass, or any non-metallic surface. It will not reduce glare from metal. You can also use a polarizer filter to darken blue skies. The blue of the sunlit sky is partially composed of polarized light. If you cut down on the amount of this light, you darken the image, so the sky appears darker. Polarizers come in two versions, linear and circular. FYI: Autofocus cameras will perform best with a circular polarizer.

FILTERS FOR BLACK & WHITE PHOTO PHOTOGRAPHY

Filters for BW are used to make one gray tone stand out more from the others. Since colors show up as shades of gray, one must have a way to differentiate between a bluebird and the green background of the tree he’s in. A filter transmits light of its own color and holds back light of other colors. Let me repeat that… A filter transmits light of its own color and holds back light of other colors. A yellow filter transmits light of yellow objects and holds back light of other colored objects. The same holds true for a green filter and a red filter and any other color filter you choose to use. Yellow filters: The darker the yellow of the filter, the darker-gray the sky will appear. For an even darker sky, you can use a green filter and the white clouds will stand out even more. A red filter will produce a sky that is almost black. Of course, filters are used for more than just changing the color of the sky. If you plan on converting your color shots to BW, you should own several different color filters for altering the original capture. Though color filters are pretty much exclusively used by B&W photographers, they might be used to reduce haze, reflections or glare.
Understanding The Effects of Color Filters on B&W Photography: Color filters allow the black and white photographer to exercise some selective control over the color tone values of an image. Using color filters on an intended black and white final digital outcome affects very much the look and effect the final image will have. Color filters work by cutting on light of their complementary colors and passing light of their same color, thus the lightening effect of similar colors and the darkening effect of complementary colors. Remember though that this act of cutting light means less light making it through the lens and onto the digital sensor, often requiring longer exposure times to make up for light loss. There are 5 filter colors that are commonly used in black and white photography - red, orange, yellow, green, and blue. Each lets through its own color of light and blocks other colors to varying degrees. The result is that colors matching the filter color appear brighter in the final image, while other colors appear darker. In black and white photography this means that objects appear as lighter or darker shades of grey.


Yellow Filters: Yellow filters are probably the most widely used, producing the most subtle effect of the 5 colored filters. In some cases the difference is barely noticeable, but it can help to lift a photo just enough. They offers an accurate tone range in compensating for the blue sensitivity of the camera sensor by slightly darkening sky and increasing contrast between blue sky and clouds. They also may help reduce haze. In portrait photography, they produce warm, natural, pleasing flesh tones, reducing freckles and red spots on skin and darkening blue eyes. Its effects are similar to that of an orange filter but less intense. Yellow filters are also good for separating shades of green, and can be used when photographing plants to increase the contrast of foliage. [It lightens: Yellow, Chartreuse, Olive, Red, Pink, Orange, and Lime Green; it darkens: Blue, Violet, Purple, and Lilacs] (hint: Increase f/stop +1)
Orange Filters: Orange filters sit between red and yellow filters, giving a nice balance of each one's properties. This makes them a popular general purpose filter. In portrait photography, an orange filter gives warm, smooth skin tones, reducing the appearance of freckles and blemishes, giving the skin a healthy, smooth look. When photographing buildings and cityscapes, they give bricks a more pleasing tone, and increase contrast between different materials to add depth and texture to the image. Similar to red filters, they can be used to reduce the appearance of fog and haze, and to darken skies and emphasize clouds.
Red Filters: Red filters produce a very strong effect and greatly increase contrast. They're often considered too "harsh" for most types of photography, but can be used to produce striking creative effects. In landscape photography, a red filter produces very dramatic skies, turning a blue sky almost black and making clouds really stand out, giving the scene a dramatic feel. They're also excellent for increasing visibility in haze and fog. When shooting plants they help increase definition between flowers by darkening the surrounding foliage. This is particularly useful when shooting red flowers, as they have a similar tone to the surrounding leaves. In summary, a red filter will let red light through, but block most green and blue. [It lightens: Reds, Pinks, Magentas, some Browns, Yellow, and Orange; it darkens: Blues, Greens, and Cyan] (hint: Increase f/stop +3)
Green Filters: Green filters are less popular than the others but are useful in some circumstances. A green filter lightens greens, separating foliage and flowers. A green filter is mainly used for photographing plants as it helps separate the green foliage from the brightly-colored flowers and buds. They can also be used in landscape photography to boost the appearance of grass and trees, but they also lighten the sky so you need to be careful not to lose detail there. Occasionally they are used to produce pleasing skin tones in portraits. [It lightens: Yellow, Yellow-green, Olive, and Greens; it darkens: Blue, Violet, Magenta, Red, and Maroon] (hint: Increase f/stop +2)

Blue filters: Blue filters are rarely used for black and white photography as they darken most colors and reduce contrast across the entire range of an image. However, when used correctly, this reduced contrast can be useful for giving a shot a calm, soothing atmosphere. A blue filter also increases the appearance of haze and mist, making it handy for enhancing the mood of an early-morning scene.


In Summary

If you’re a serious outdoor photographer, the judicious use of filters at the right time can vastly add to the resulting quality of your image. If you're serious about taking pictures for conversion to black and white, then a selection of colored filters is a great addition to your kit. They'll give you much more control over the way your photos appear, helping you to create mood, balance contrast, and emphasize the most important parts of a scene.

Which filter should you buy? In the “Universal” category above, a circular Polarizer Filter and a GND Filter would be the top two choices. If your looking for a lens protector, choose a Yellow Filter. Not do you only get lens protections, you get the benefit of the subtle changes made by this filter, as well as its benefits for landscape photography where the effect on blue is just enough to make a light sky a shade darker than the print's border. After this, choosing a Red Filter will probable provide you with the most use for creating Black & White photographs. Some of the more popular brands are Cokin, Lee, and Singh-Ray. Cokin filters are a great starting option as they are more budget-friendly and give reasonable quality while the more expensive filters will be much higher build quality and will give better, and more consistent results as well as less color casting from stacking multiple filters.

As a final note, remember that all filters reduce the amount of light available to some degree. For instance, a polarizing filter will reduce light anywhere from 1 to 2 f/stops, requiring you to compensate for this light loss. If you are using an automatic camera with TTL metering, this shouldn’t be an exposure issue, but is worth mentioning as you’ll find yourself in situations where the light loss is significant enough to force you into using slower shutter speeds or wider apertures, and possibly a tripod.

Understanding Camera Modes – Key to Controlling Exposure

Photo TipsToday's Photo Tip:  It’s not surprising that most camera owners use the Automatic (iA) mode. Auto mode tells your camera to use it’s best judgment to select shutter speed, aperture, ISO, white balance, focus and flash to take the best shot that it can. On newer cameras, these automatic modes can even analyze the type of scene and lighting conditions, allowing the camera to then selects one of its scene modes (more on these different modes later) that has the best exposure setting for that type of picture. Using this mode will give you nice results in many shooting conditions, making it easy to get into the habit of using. However, you need to keep in mind that you’re not telling your camera any extra information about the type of shot you’re taking so it will still be ‘guessing’ as to what you want. As a result some of the following modes might be more appropriate to select as they give you more control over the shot.
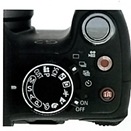

Mode dial003A good understanding and proper use of digital camera modes can be essential in accurately controlling the exposure in photography. The camera mode dial is typically a large round rotatable dial that has the modes listed as Program (P), Shutter Speed (S), Aperture (A), and Manual (M). Combined with ISO, these modes let you manually control some or all parameters of the exposure. Let's take a look at each of these modes.


(P), Program mode, automatically chooses the Aperture and the Shutter Speed for you, based on the amount of light that passes through the lens. Depending upon the intensity of light, the camera will try to balance between aperture and shutter speed. In this mode, some cameras allow you to override the "camera-guessed shutter speed and aperture" by manually making adjustments to one or the other. Program mode is similar to Auto but gives you a little more control over some other features including flash, white balance, ISO etc. Check your digital camera’s manual for how the Program mode differs from Automatic in your particular model. This mode is best used for "quick point & shoot" situations.

(S), Shutter Priority mode, lets you manually set the camera’s shutter speed while the camera 
automatically increases and decreases the aperture based on the amount of light that passes through the lens. This mode is intended to be used when motion needs to be either frozen or intentionally blurred. The danger in using this mode is the limitation (min/max f/stop) of your lens, which can result in either an underexposed or overexposed image.

(A), Aperture Priority mode, lets you manually set the lens aperture, while the camera automatically picks the right shutter speed to properly expose the image. It gives you full control over subject isolation and allows you to have full control over depth of field, because you can increase or decrease the lens aperture and let the camera do the math on measuring the right shutter speed. There is very little risk of having an overexposed or underexposed image because the shutter speed (depending upon the camera) can go as low as 30 seconds and as fast as 1/8000th of a second, which is more than sufficient for most lighting situations. This should be your most used mode.

(M), Manual mode, lets you have full control over your camera. You need to think about all settings including shutter speed, aperture, ISO, white balance, flash etc. Because you can manually set both the aperture and the shutter speed to any value you want, as well as other exposure controls, it gives you the flexibility to set your shots up as you wish. Of course you also need to have some idea of what you’re doing in manual mode. This mode is generally used in extreme lighting situations where the camera has a hard time figuring out the correct exposure and incorrectly guesses the exposure by either overexposing or underexposing the rest of the image. Manual mode is also useful for consistency by insuring that both shutter speed and aperture stay the same across multiple exposures when taking panoramas requiring stitching - otherwise, some images will be darker, while others are lighter.

(ISO) What about ISO? Most digital cameras do not automatically change ISO in the above camera modes, so you have to set it manually. However, many cameras have an "Auto ISO" setting that, when enabled, will allow the camera to adjust ISO as needed. If you do not have an “Auto ISO” feature, then set your ISO to the lowest ISO number (usually ISO 100) and increase it as needed in low-light situations.
Other Modes: Most of today's camera offer dozens of additional pre-defined modes, with some of the more common (Portrait Mode, Scenery Mode, Sports Mode, Close-up Mode, Movie Mode,etc.) directly on the mode dial and often many more grouped under something like Scene (SCN) mode. Each of these modes generates specific camera settings that have been determined to work best in the selected scene.  Even though these give your camera a few more scene taking hints (without you needing to do anything more), try not to rely on these settings too much. First of all, these camera-specific settings vary by camera. Second, they simply use a combination of the above modes with the help of some camera-specific settings that still will not work in every situation.


In Summary: Each of these modes has its own purpose and value, and should be used accordingly. However, as noted previously, the mode that will provide you with the most consistent exposure results is the (A) Aperture Priority mode. When shooting panoramic pictures that will require stitching, use the (M) Manual mode.